Polar Ice
Description
Super white, super translucent, super plastic porcelain. A casting version is also available.
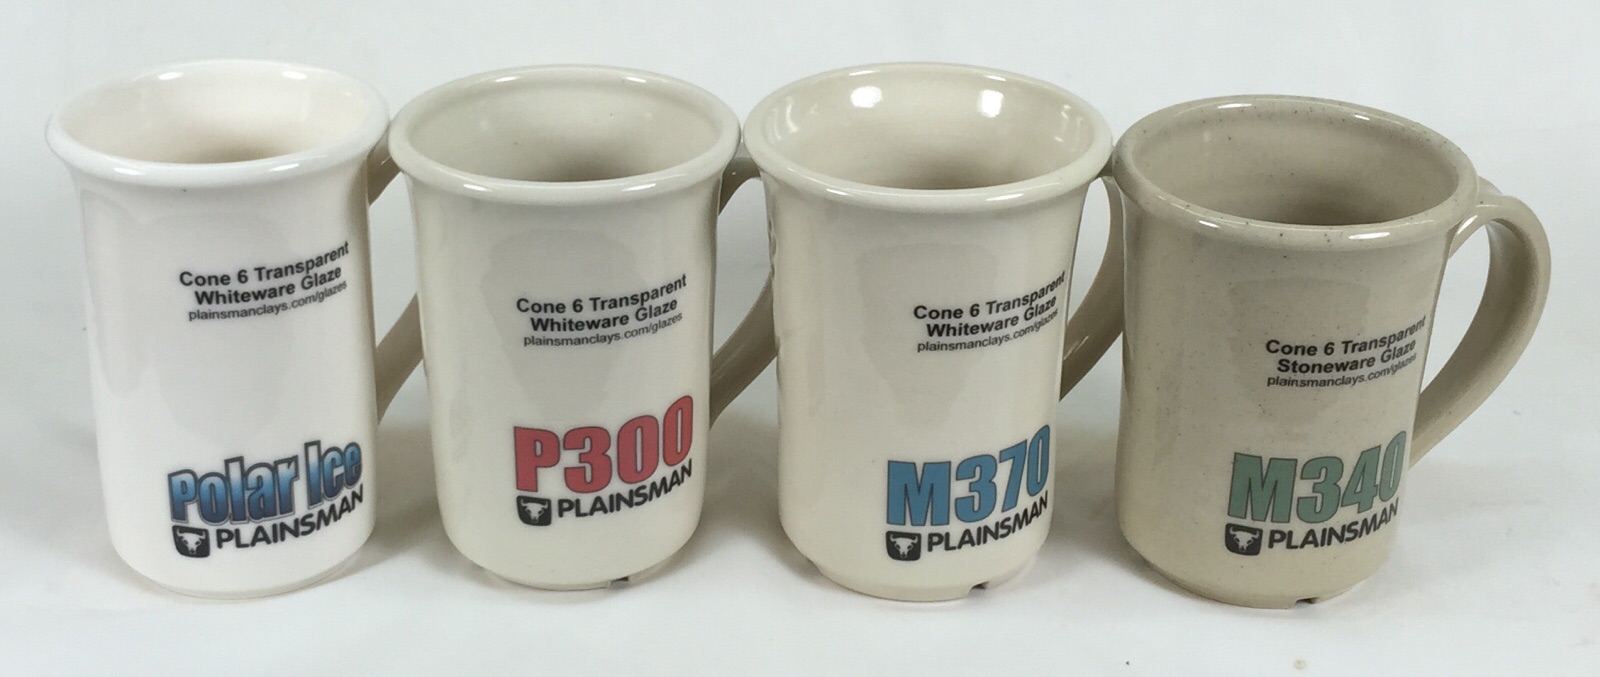
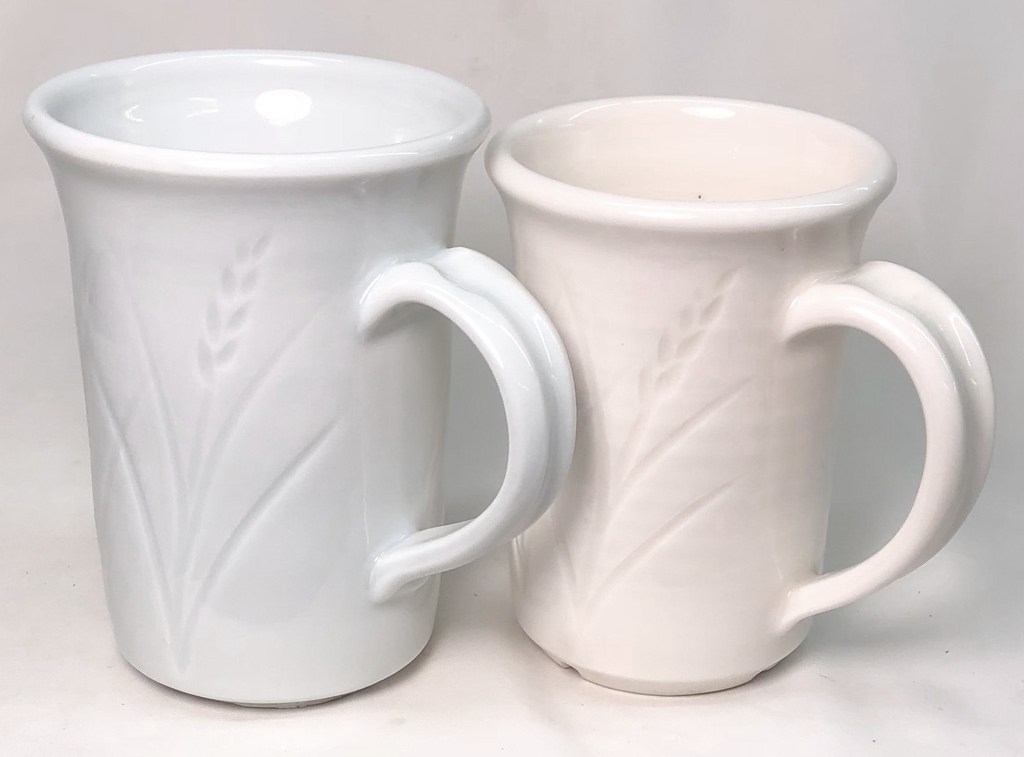
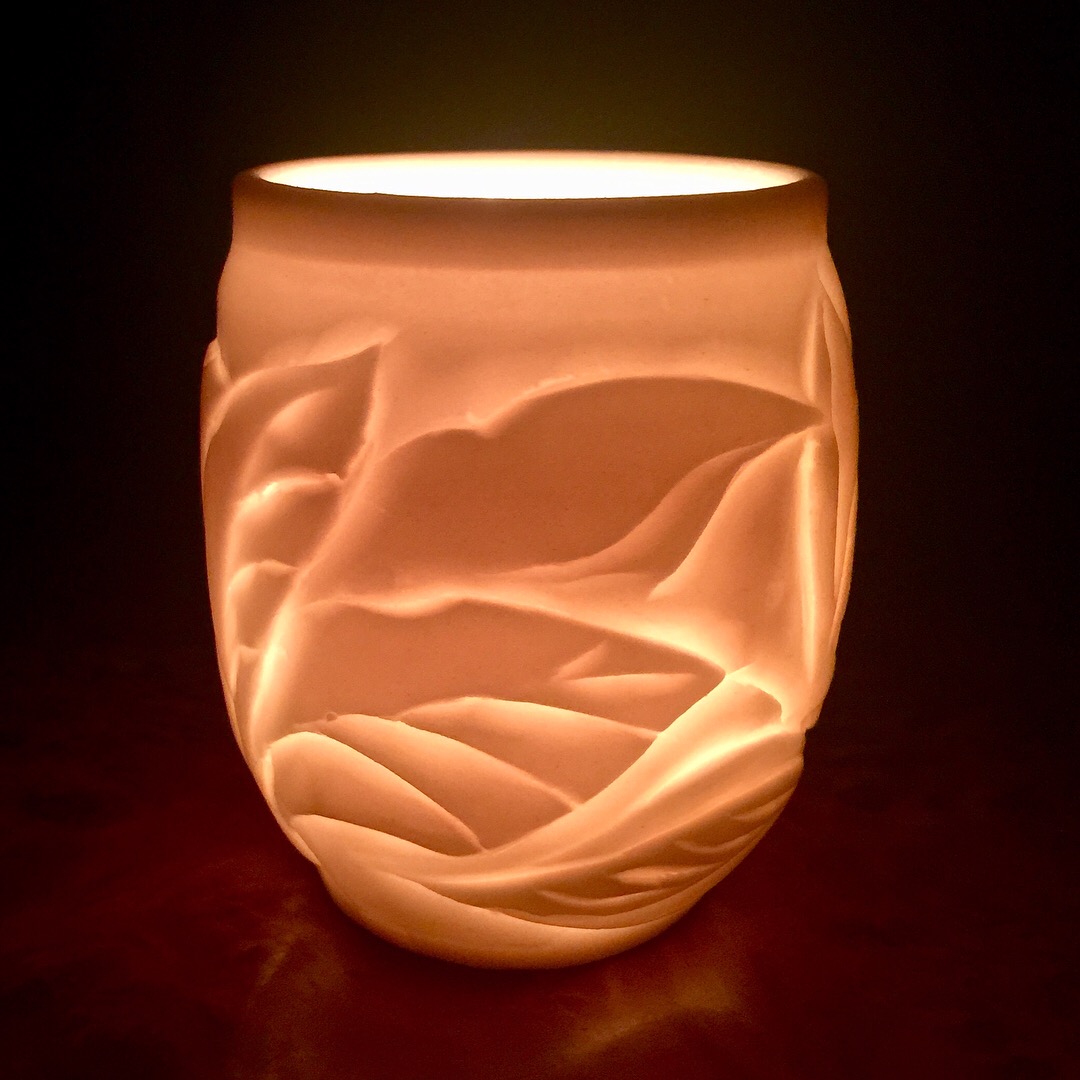
Plainsman Polar Ice, P300, M370 and M340 with G2926B Whiteware transparent glaze on the porcelain (G2916F Stoneware transparent on the M340).
This body employs New Zealand Halloysite, a super-white-burning kaolin from New Zealand. To that it adds the highest quality ceramic plasticizer available, making it the most plastic clay body you likely have ever used (of any kind)!
Disclaimer: Please match your expectations to the reality of what Polar Ice is. It is expensive compared to our other bodies because of the cost of materials and difficulty of production. But Polar Ice is not nearly as expensive as it would be if we were to purchase special filter-pressing, slurry-screening and pre-pugging equipment to guarantee top quality. We actually make it by mixing the powder and water right in the pugmill! Why? It is too plastic to be slurry-mixed (without huge quantities of water), too sticky to be filter pressed or extracted from a prepugger! Our production method is the only way it is possible. But that comes at a cost: Some fired specks and hard chunks. But if you are willing to make a commitment and adjust your expectations, you will be able to make ware that was once impossible for potters.
At times you may find surface discolouration on the slugs from bacteria growth (if the material is old).
If you wish to make your own by mixing the kaolin, feldspar, silica and Veegum we recommend the L3778D recipe.
Process Properties
Using Polar Ice is more of a commitment than other bodies. Compromises are required and expectations are different.
Plasticity: Polar Ice is extremely plastic. Others claim to be plastic, but they use the word in a relative sense (meaning "a little less short than other really flabby porcelains"). However Polar Ice is only plastic when stiff enough (do not attempt to use Polar Ice if it is too soft).
Stiffness: To properly pug it we must make it too soft. However, it stiffens over time. Consider keeping a box of stiffer material to wedge together with softer. Failing that, reduce water content on a very clean plaster surface or leave a lump under a cloth. When wedging together different stiffnesses or clay that has been stiffening on a plaster batt it is imperative to do so thoroughly or throwing and drying will be adversely affected (wedge until the surface feels evenly sticky). If you are unable to wedge effectively it is better to use a different body.
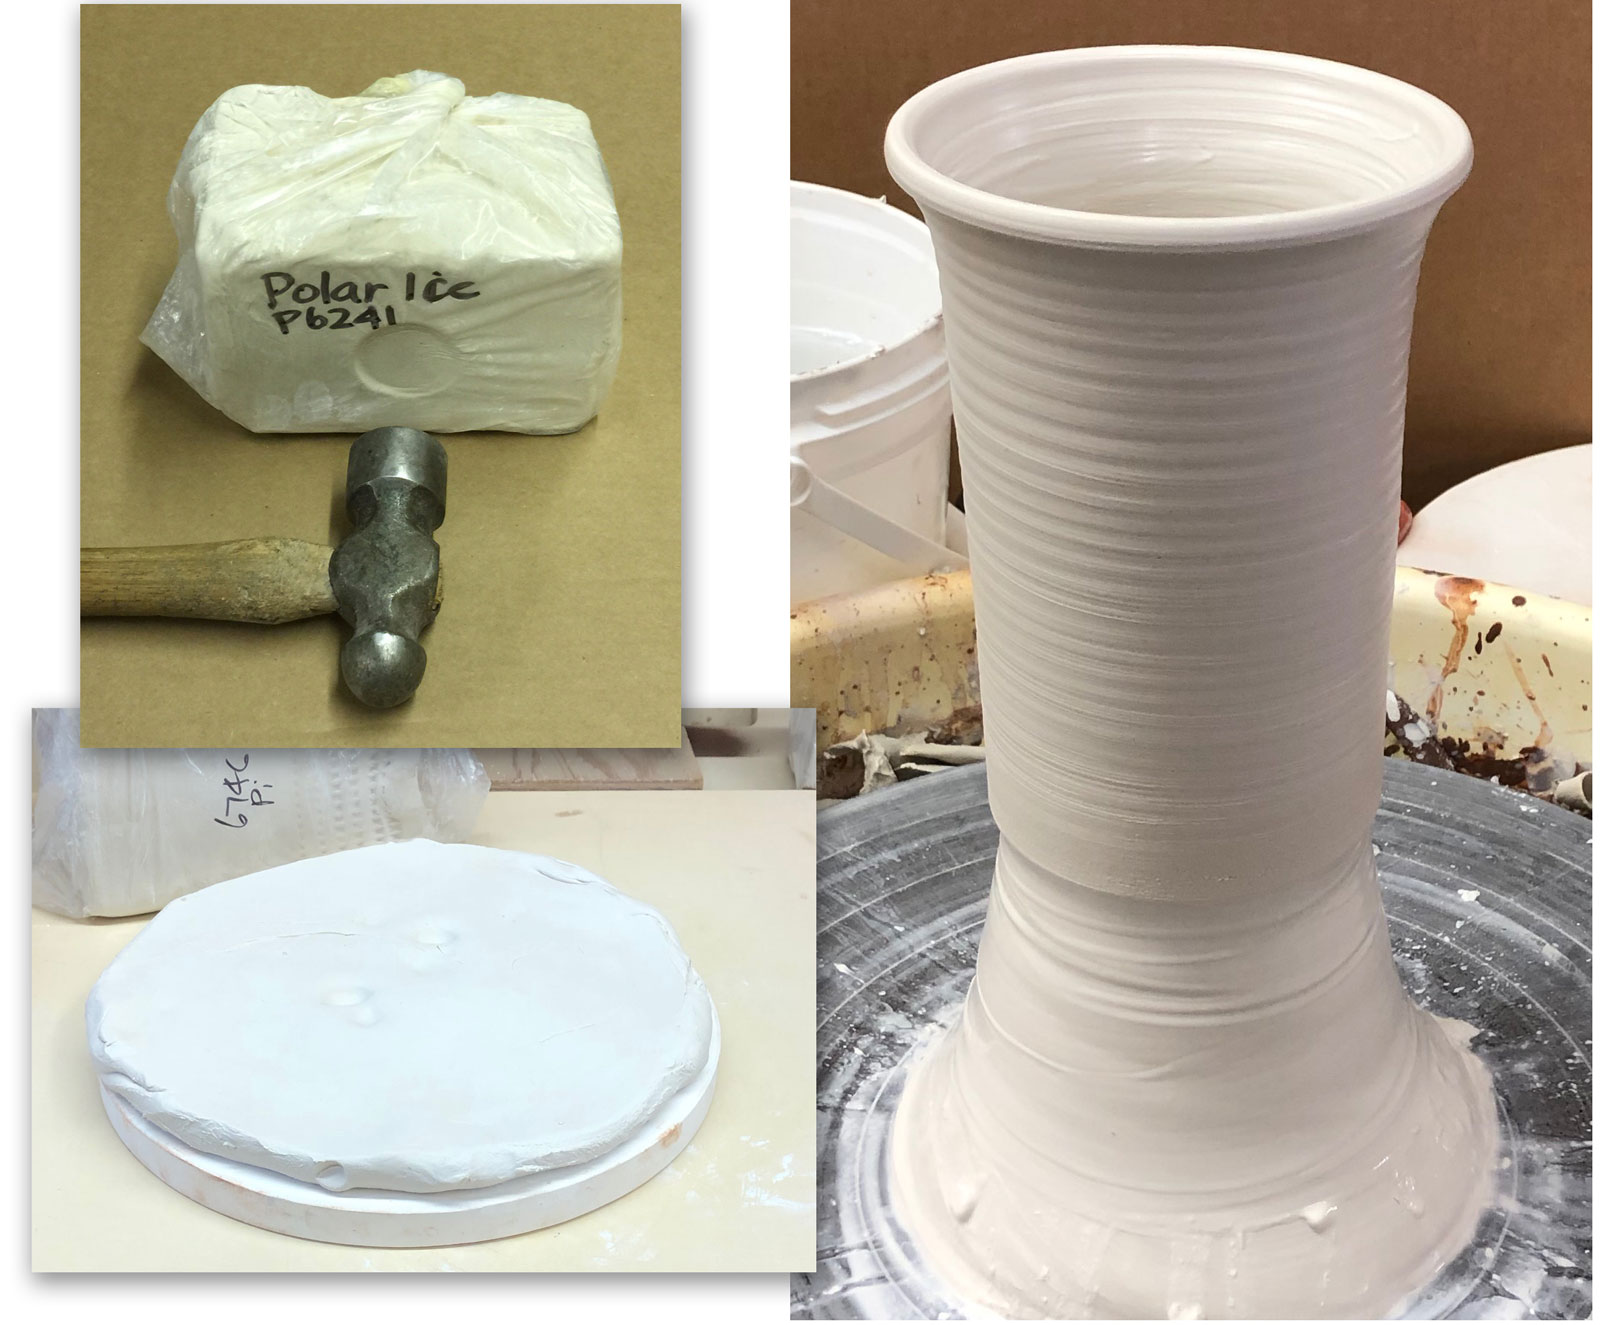
Polar Ice is not ready-to-use out-of-the-box. It comes out like a rock and then softens to a sticky, unusable mass when wedged! Flatten pieces on clean plaster bats to dewater for a while, then wedge thoroughly (repeat until it is no longer sticky). When it is wedged really well and the stiffness is right it will want to go taller and thinner than any clay you have ever thrown!
Stickiness: This is the most prominent side effect of the plasticity. It will stick to your hands, to the table, to the cutting wire, anything that touches it. During trimming it will stick back to itself and tools. If you attach ware to the wheelhead with water to trim, it will stick fast. After trimming it balls up under your fingers if you attempt to round corners by pressing on them. However when stiffened to optimal throwing stiffness, it is much less sticky.The stickiness is an asset when joining, the slip glues it well (if adequate pressure is applied).
Drying: Porcelains do not dry as well as stonewares or bodies with particulates. You will get the best results if the clay is not too soft, ware is not too thick, contours are smooth, wall thicknesses are even, joins are few and done with thick slip, the degree-of-wetness in all parts of a piece is kept equal throughout all stages of drying. Large pieces are best made on plaster bats so the bottom can stiffen with the walls. The worst drying performance will occur with thick ware made from very soft clay, the use of non-absorbent bats, where vessel walls are thick at the bottom and thin at the lips or edges, walls are of uneven thickness with lots of joins or abrupt angles (giving cracks a place to start) and where drying is uneven (e.g. lips and edges are permitted to stiffen early on while lower sections remain soft). Large, flat plates are the most difficult shapes to dry, it may be necessary to stretch the time out to a month or more to achieve the even drying needed for success.
Polar Ice is more difficult to dry than most other porcelains. For the most foolproof process consider conducting the entire process under cloth and plastic, changing the cloth every fews days. This can take weeks, but will give a much higher success rate.

Even though it is very plastic, it dries well (if not too soft).
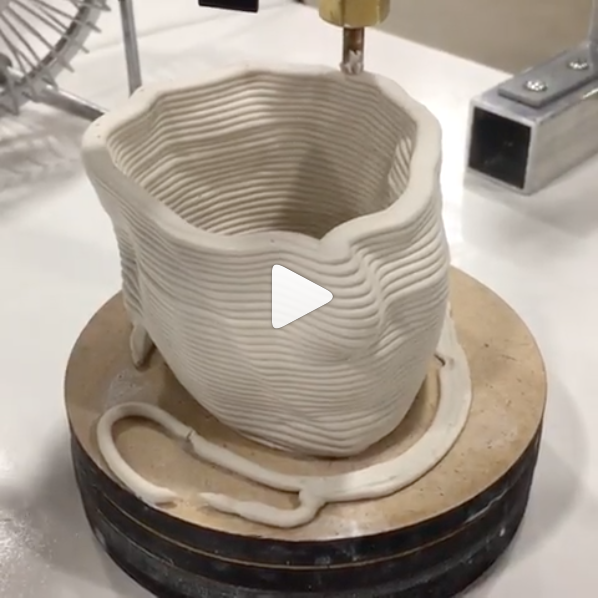
3D Printing
The stickiness and extreme plasticity of this body have enabled many people to use it as a 3D printing clay. Polar Ice in plastic form contains 3.5% Veegum (the casting version has 1% Veegum). Layers adhere well and pieces can hold up even though the clay may be very soft. We manufacture it in soft form, and although it may feel very stiff in the box, upon wedging the clay softens markedly and might be suitable if you have a 3D printer that can handle stiffer paste (of course, if the clay is getting old it will be stiffer).
The Veegum in Polar Ice slows drying and increases drying shrinkage - be judicious about how fans are set (they should expose all sides to draft). Printing on a piece of plaster is also advisable (it will draw water from the base). If the plastic version of Polar Ice is just too stiff then you might consider mixing the printing paste from the casting version. It will not be as plastic but will dry faster. Adding Veegum will improve its plasticity (but beware of how difficult it can be to slurry up a body containing a lot of it).
You may wish to make your own translucent porcelain, the L3778D and related recipes are a good start. An advantage of this is being able to tune the recipe for the best results possible. If you discover ways to print this type of body more effectively please contact us, we would appreciate it.


Firing
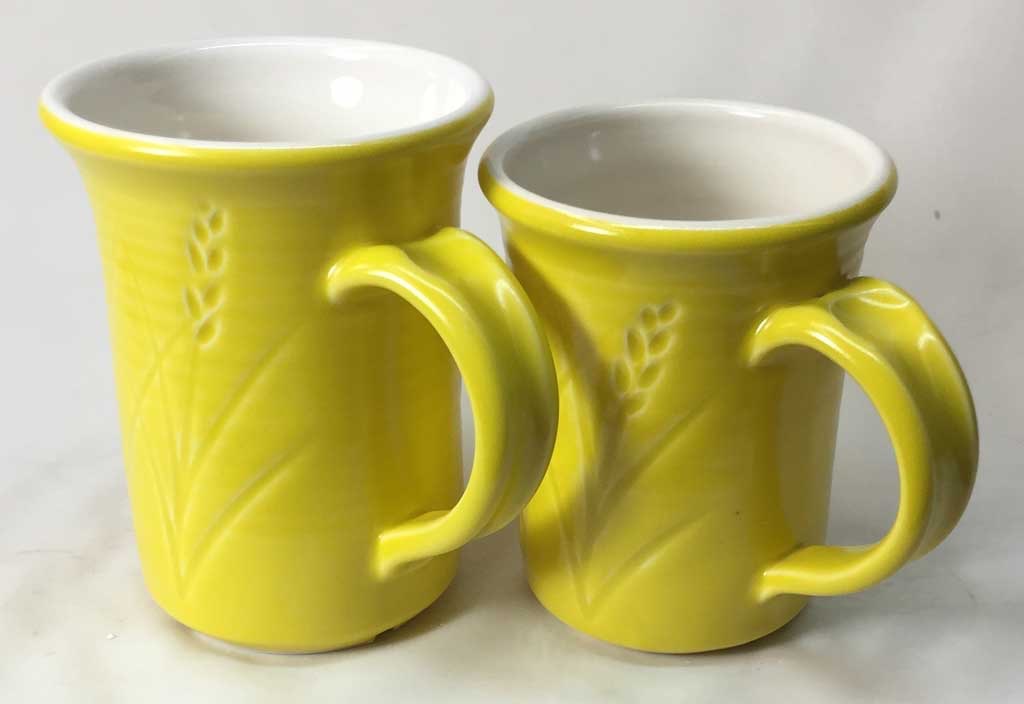
We have had consistent results firing to cone 6 oxidation. We formulated it so that a thin-walled, vertical-sided mug with flared lip will not pull to an oval-shaped rim during firing (by the weight of the handle). Notwithstanding this, in our lab we can get translucency down to cone 4. We have fired it to cone 8 oxidation (with more warping) and cone 10 reduction (with surprisingly good results and little warping). Very durable and strong ware can be made using this body.
To get maximum translucency it is not necessary to fire over cone 6. The casting version is not quite as translucent as the throwing version (however the walls of cast piece are generally much thinner). You can enhance the translucency of the casting version by additions of Ferro Frit 3110 (e.g. 5%).
As with any body, bisque fire it to the highest practical temperature (high enough to burn out undesirables, but low enough to have the needed porosity for glazing). Cone 06 is a good starting point.
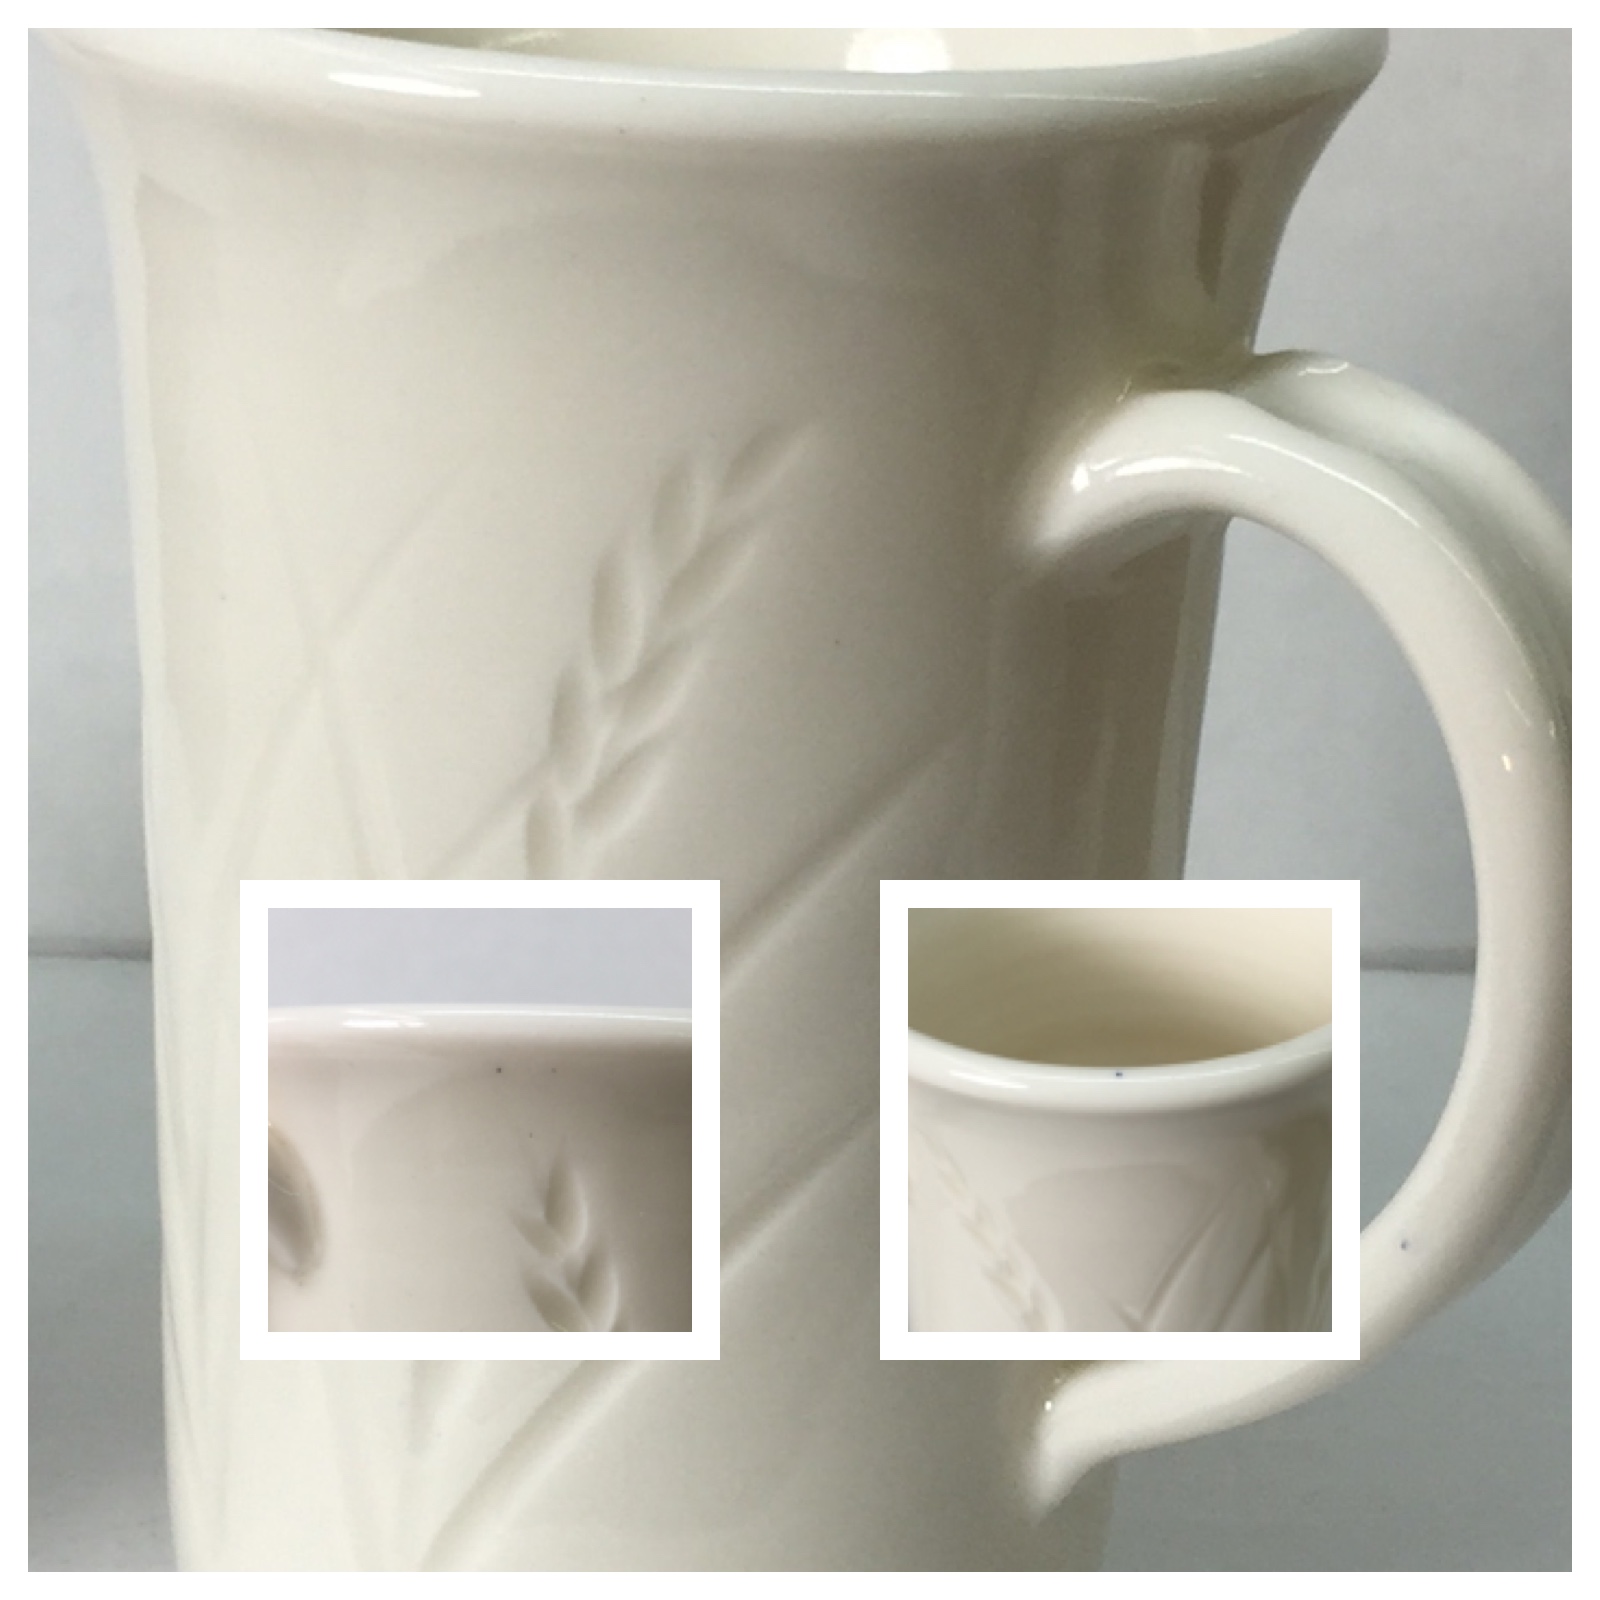
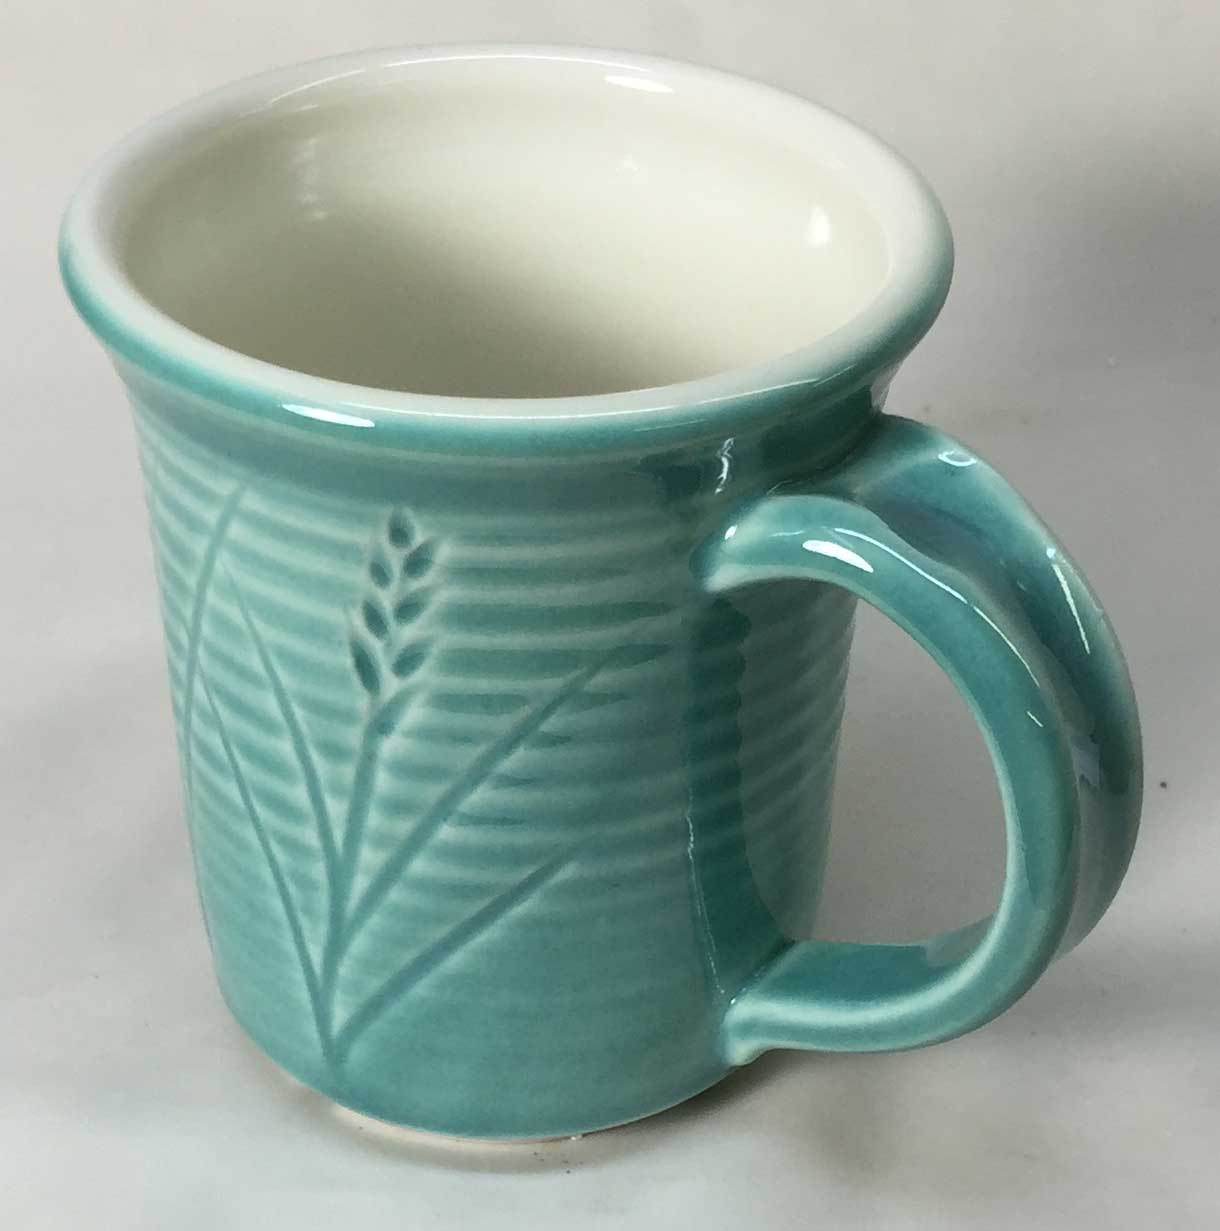
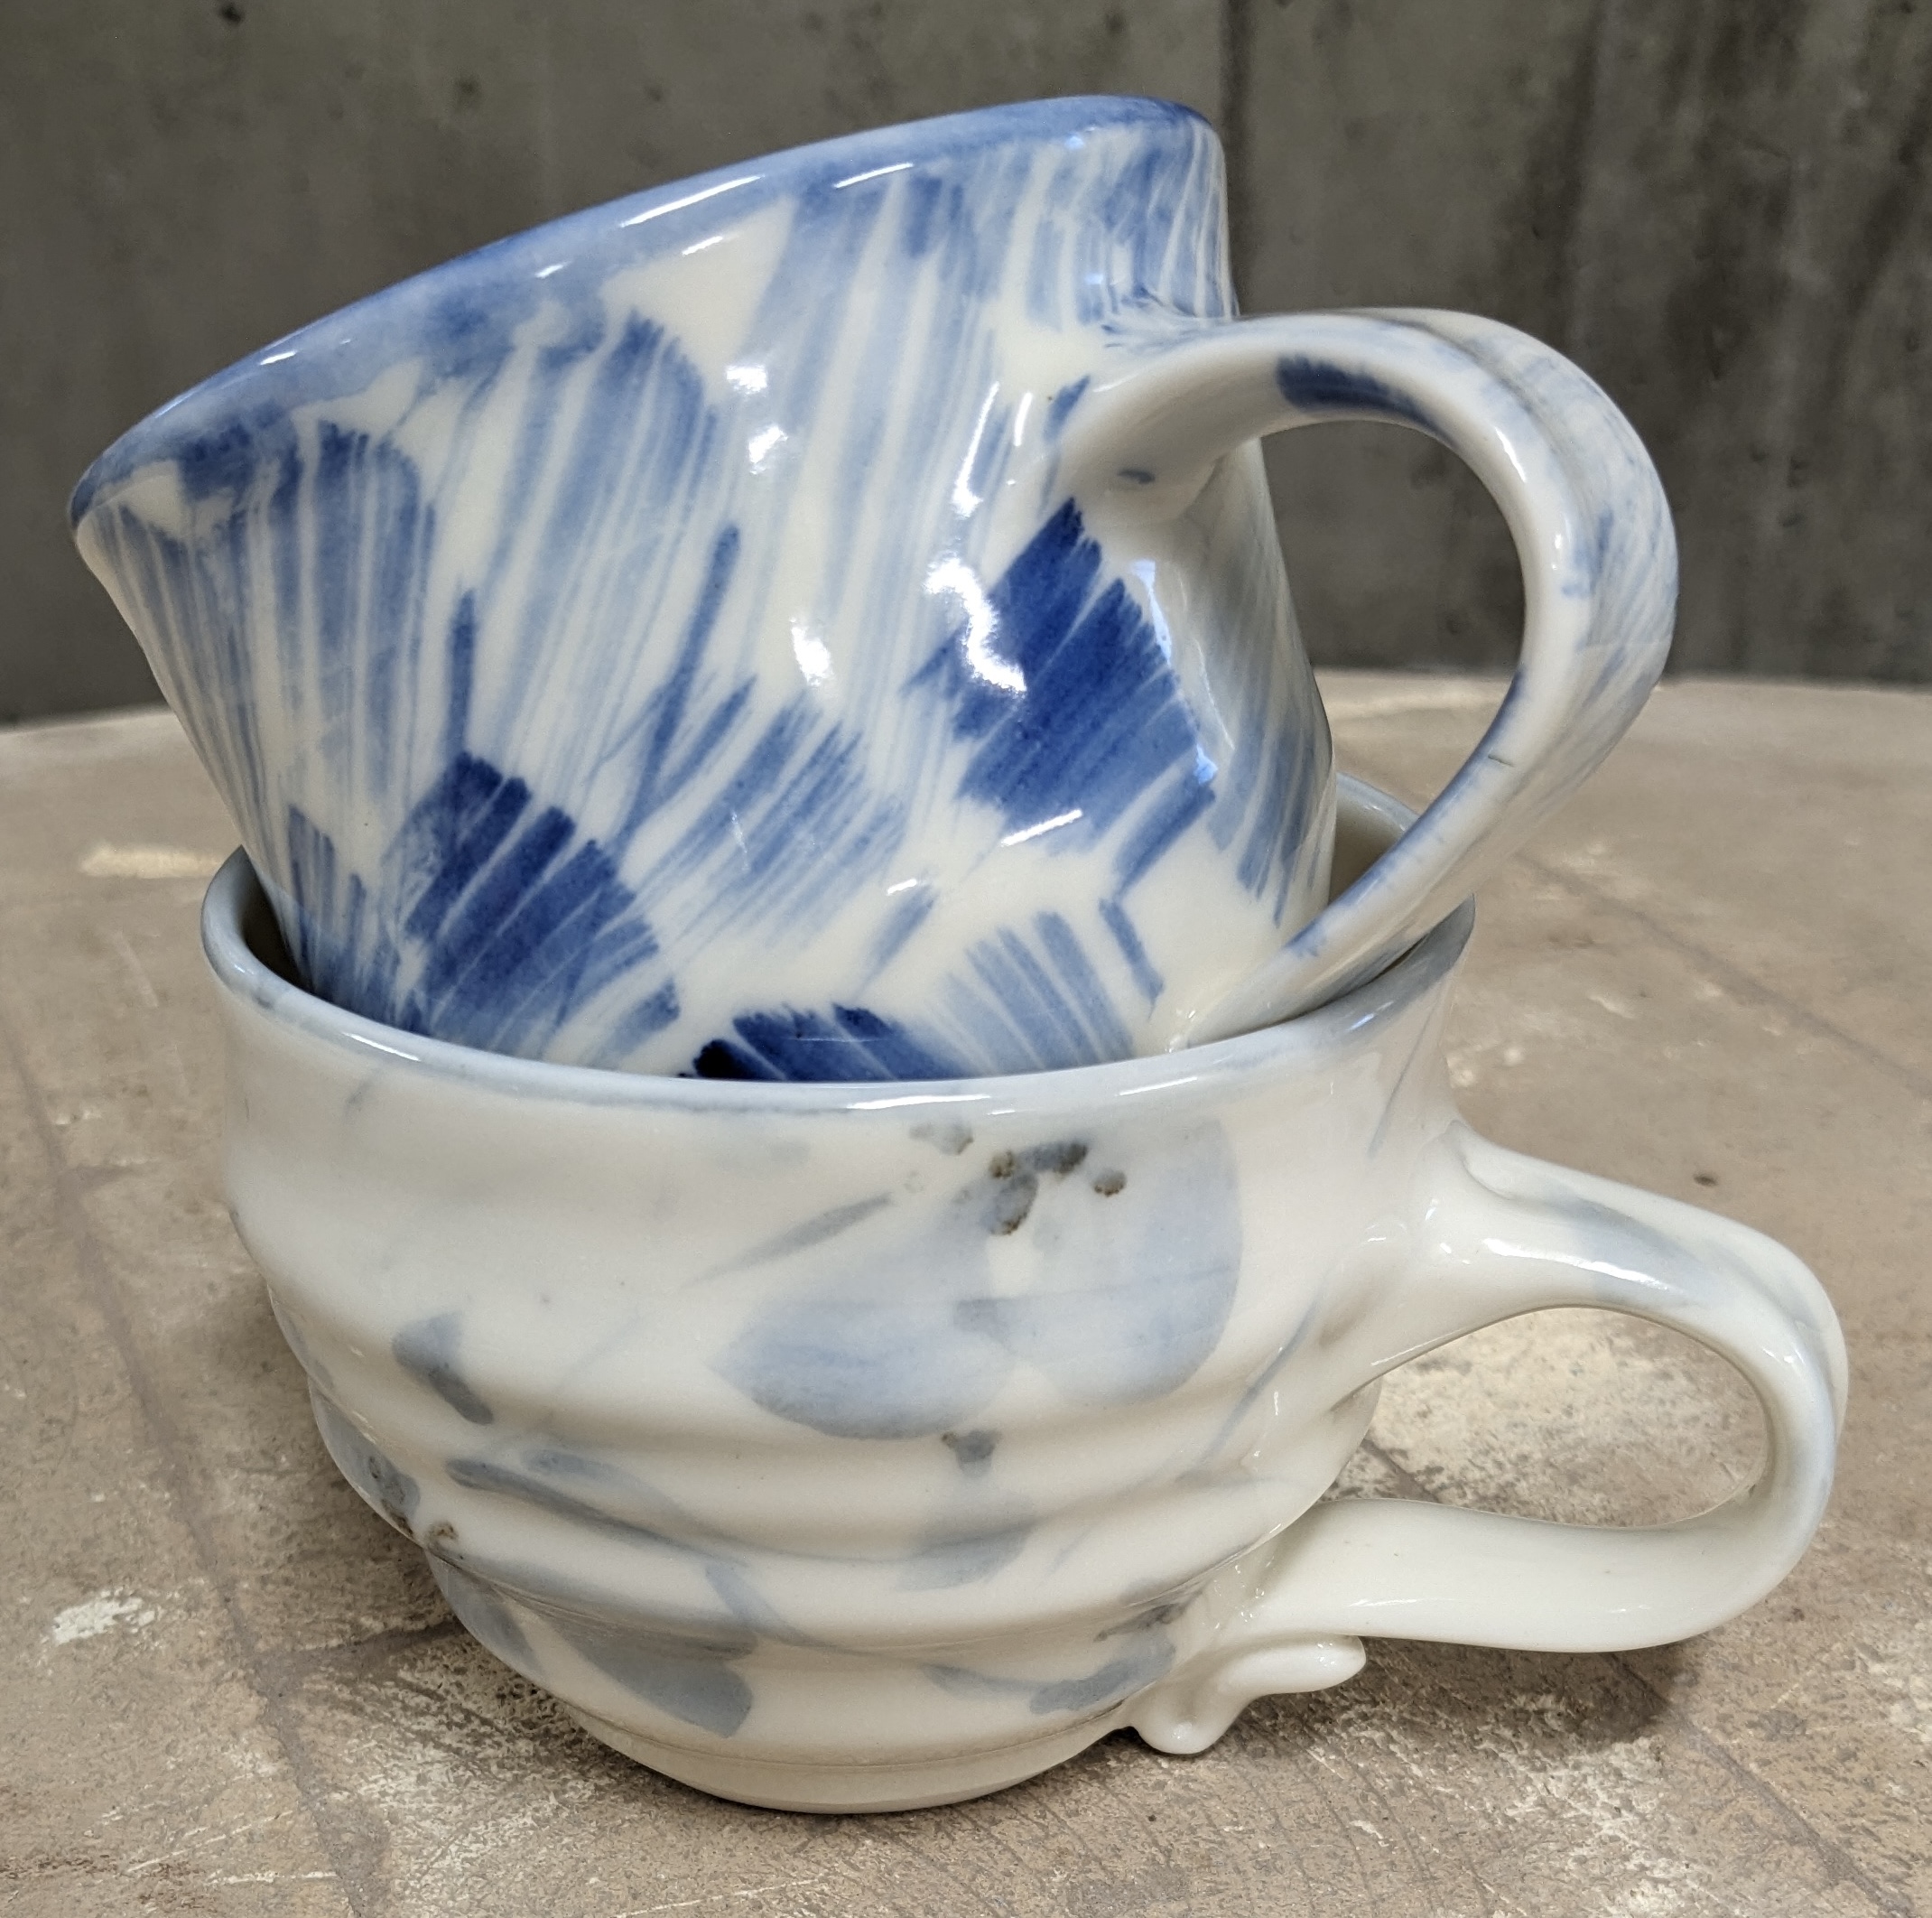
Impeccable cleanliness is needed to minimize fired specking for transparent glazes. At the same time, we cannot guarantee a completely speck-free result. This body is not filter pressed. While this background mug is speck free, the other two are not. The blue speck on the mug rim (right) is likely contaminant picked up during the process. The small black ones on the left could have come in the material.
To get the best defect-free surface please consider using a drop-and-hold firing schedule, for example the PLC6DS schedule. If crystallization during cooling is not an issue, glazes will give optimum results if slow-cooled also (e.g. the C6DHSC schedule).
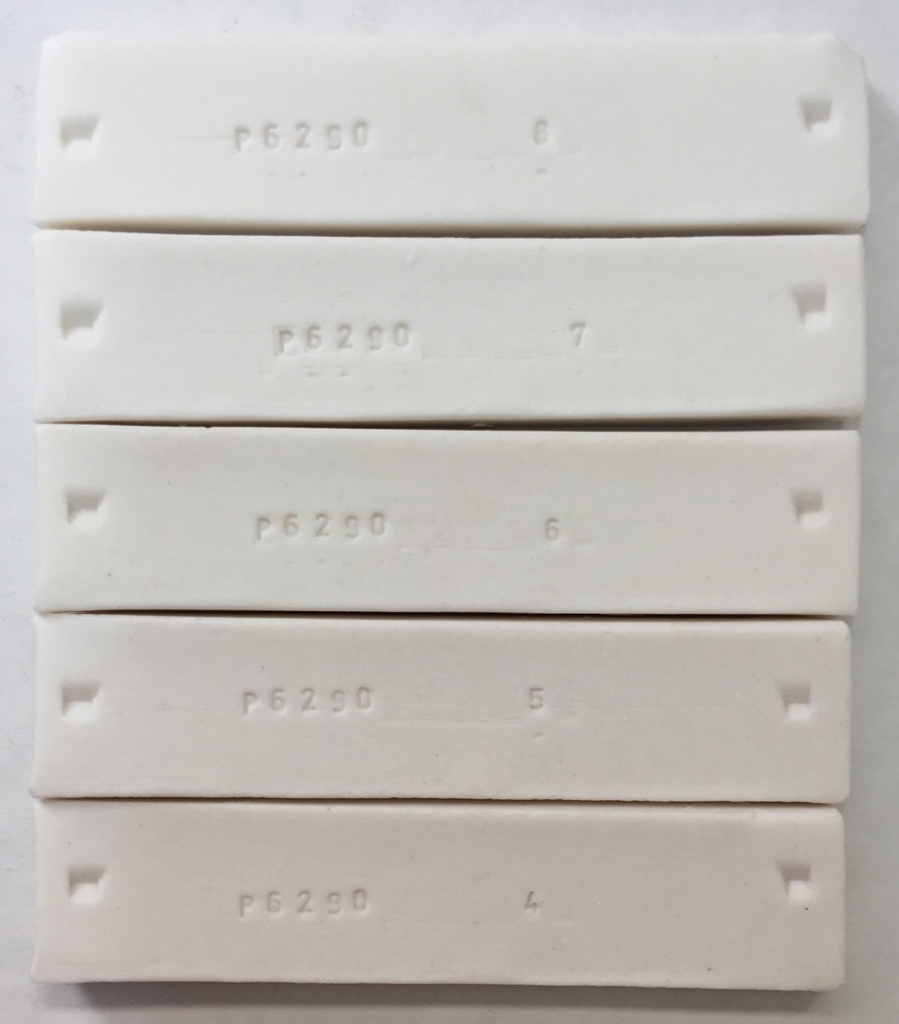
Polar Ice fired bars (cone 4-8 oxidation bottom to top). At cone 8 the body is very glassy and beginning to melt.

Glazing
Commercial brush-on glazes: They may or may not fit our clays (check for glaze fit using a BWIW test or similar). For brightly colored glazes (especially with layering) do a leach test (e.g. GLLE test). Consider using a transparent or white liner glaze for food surfaces.
DIY brushing glazes and dipping glazes: Begin with good transparent base recipes that do not craze, cutlery mark or leach on the body. Our G2926B glossy and G2934 matte can be purchased as powders or weighed out from their recipes (both can be adjusted for glaze fit). The two can be mixed to fine-tune matteness (e.g. 15:85 matte:gloss mix gives us a silky matte). Stains, opacifiers and variegators can be added to make almost any effect. Consider also making glazes based on GA6-A and GR6-A.
Crazing: Functional ware must remain craze-free (crazing is unsanitary and drastically reduces ware strength). Even though ware may not be crazed out-of-the kiln it may do so with time. Do cycles of a boiling water:ice water immersions (BWIW test) on a piece to test glaze fit (by stressing it to bring out any crazing or shivering tendencies).
Thixotropy: If you want the best application properties for one-coat dipping, consider creating a thixotropic slurry. Thixotropic glazes are creamy because they have been thinned and then gelled by the addition of a flocculant.
If you want to develop and mix your own glazes and engobes consider getting an account at insight-live.com. You can organize a methodical development program and adopt better methods of testing (e.g. melt fluidity, thermal stress, slip-fit tests).
Casting Recipe
Polar Ice in plastic form contains 3.5% Veegum (the casting version has 1% Veegum). Casting this body requires extra care, good mixing and some compromise to get a slurry of the right consistency. Please read up on deflocculation if you are new to this. A good propeller mixer is important. Be aware: Polar Ice contains a plasticizer to impart the plastic strength to better enable pieces to shrink and pull away from the mold, this requires double the normal amount of Darvan and lengthens casting time considerably. Also: Polar Ice pieces will warp on firing if they are thin or shapes are unstable.
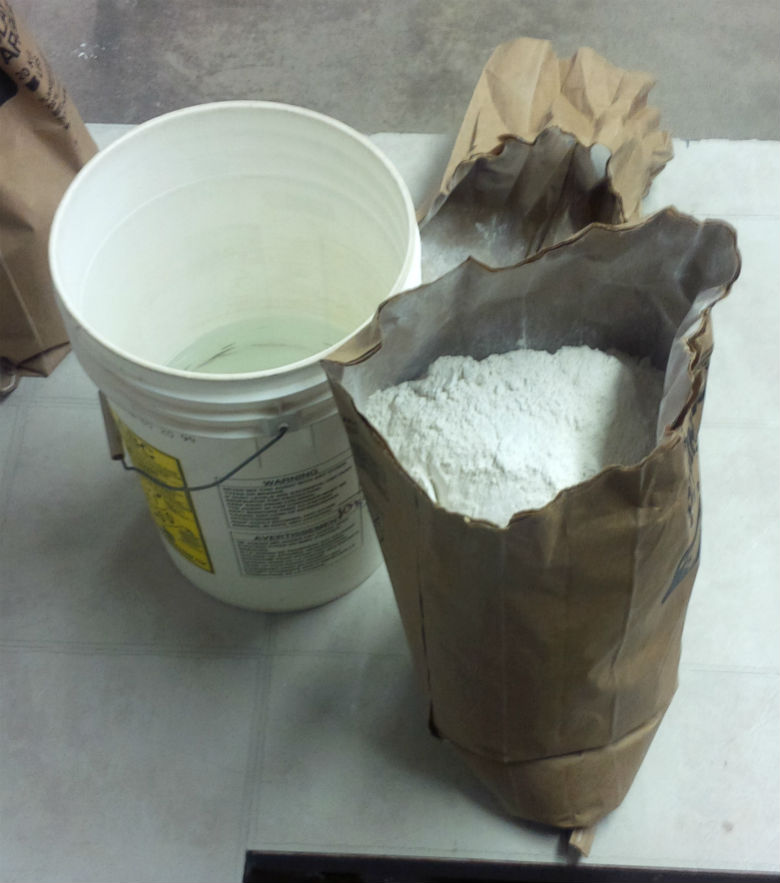
Because of the magic of defloccualtion you can mix all this powder into that little bit of water! This 20 Kg bag of porcelain needs only 9 Kg of water in the bottom of that pail. The secret is that the water contains a small amount of Darvan, it makes the particles repel each other electrolytically enabling a fluid slurry with only a little more water than is in a throwing clay!
Casting properties depend on proper deflocculation. Watch out for powdery or dry-feeling pour surfaces (shortly after pouring out the slip), these mean over-deflocculation.
Recipe Used in the Plainsman Lab
Produces a specific gravity of ~1.7 (well-mixed slip has a Ford Cup viscosity of 40 seconds, Laguna Viscometer reading of 140 seconds). This is a conservative recipe with a lower-than-typical specific gravity (to enable casting a smectite-containing clay). If your slip is not flowing well enough test adding more Darvan to a small amount first, if that does not help add more water.
Do not mix up a 20kg bag to start, experiment with a small mix first. It is possible to over-deflocculate and end up with a bucket of jelly that must be discarded.
| % by Weight | x 10 for Small Test |
x 297 for Production |
|
|---|---|---|---|
| 67.3 | 673g | 20kg | Polar Ice Casting Mix Powder |
| 32 | 320g | 9.5kg | Water (distilled recommended) |
| 0.7 | 7g | 208g | Darvan No. 7 |
Water and Darvan percentages may need adjustment. Add 90% of the Darvan to the water and mix it in. Then add the powdered body mix to the water under a propeller mixer. Mix at least 15 minutes. If you cannot get the last of the powder in, add the rest of the Darvan. Do a preliminary assessment:
- Measure the specific gravity.
- If it is high, add water (adding 50 grams of water to a 1 US gallon batch will drop the specific gravity by about 0.1 - e.g. from 1.79 to 1.78).
- If it is too low, make a note for next time to use less water.
- Check the viscosity. If the slip is still not fluid enough, mix it longer, another half hour if possible (or age overnight and power-mix more the next day). If it is still too viscous add a little water (you will have to tolerate a lower specific gravity).
If you can tolerate molds getting wetter (and longer mold extraction times), adding water to the slurry will not be a problem (although too much may cause settling issues).
You can make about 1 US gallon from 5000 grams of powder. You can make about 1 Canadian gallon from 6300 grams.
Mix your own translucent casting porcelain if you can get Grolleg kaolin, please check this page for information.
Thermal Expansion
We do not supply thermal expansion values. If a chart is supplied here, please view it only as a way to compare one body with another. Please note that, although you may calculate the thermal expansion of a glaze, this cannot be done for clay bodies since they do not melt. The best way to fit glazes to clay bodies is by testing, evaluation, adjustment and retesting. For example, if a glaze crazes, adjust its recipe to bring the expansion down, fire a glazed piece and thermal stress it (using an IWCT test, 300F into ice-water). If it still crazes, repeat the process.
Physical Properties
 Drying Shrinkage: 5.5-6.5%
 Dry Strength: n/a
 Water Content: 21.0-22.0 Drying Factor: C130
Sieve Analysis (Tyler mesh):
 100-150: 0.1-0.3
 150-200: 0.5-1.0
Fired Shrinkage:
 Cone 5: 8.0-9.0
 Cone 6: 8.5-9.5
 Cone 7: 8.5-9.5
Fired Absorption:
 Cone 5: 0%
 Cone 6: 0%
 Cone 7: 0%
Compared to Others
Competing NZ Porcelains from Other Manufacturers: Polar Ice is likely very different. We are pretty sure you have never used anything like this before!
- Polar Ice is much, much more plastic that other competing products we are aware of. There is no need to age it to make it better.
- It is likely more expensive (or much more expensive) than others you have tried. The white plasticizer used is twenty times more expensive than any other ingredient in the recipe. Other manufactures have chosen to minimize its percentage to keep costs and price down or because their equipment cannot handle the higher percentage.
- Polar Ice is more likely to be too soft and need stiffening.
- It likely has a lower firing shrinkage (a product of our use of less feldspar).
- It has a higher drying shrinkage, up to 7% (other porcelains will likely be 5.5-6.0%). This is a product of the higher plasticity.
- Drying performance may be worse or better. The higher shrinkage makes cracking more likely but the higher dry strength resists it and the higher plasticity enables making ware thinner and more even. With proper procedures and routine you will lose minimal ware.
- It fires whiter. This is likely a product of our choice of feldspars and the high quality plasticizer.
- It is more translucent (the reason for this is proprietary).
- It is stickier. The stickiness less if the water content is reduced before use.
- It dries slower (because of the high plasticity).
- It sets in the box. When you first feel it you will swear it is too stiff. But it isn't, start moving it it softens dramatically.
Downloads
- Brochure for double-sided printing (uncheck the Fit to Page checkbox when printing or it will be too small)
Gallery
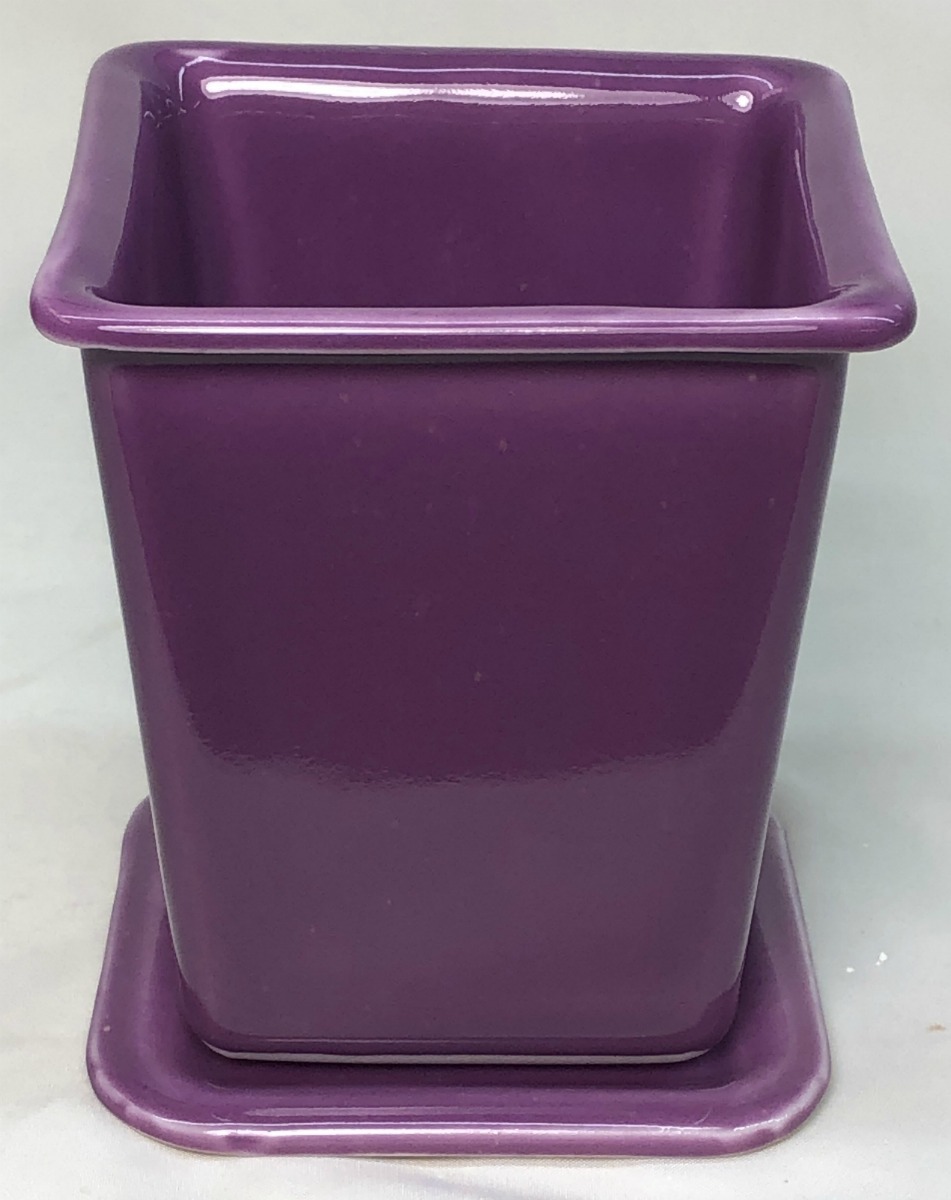
Polar Ice casting succulent plant pot and tray. The glaze is G2926B with 10% Mason 6304 and 2% Zircopax.

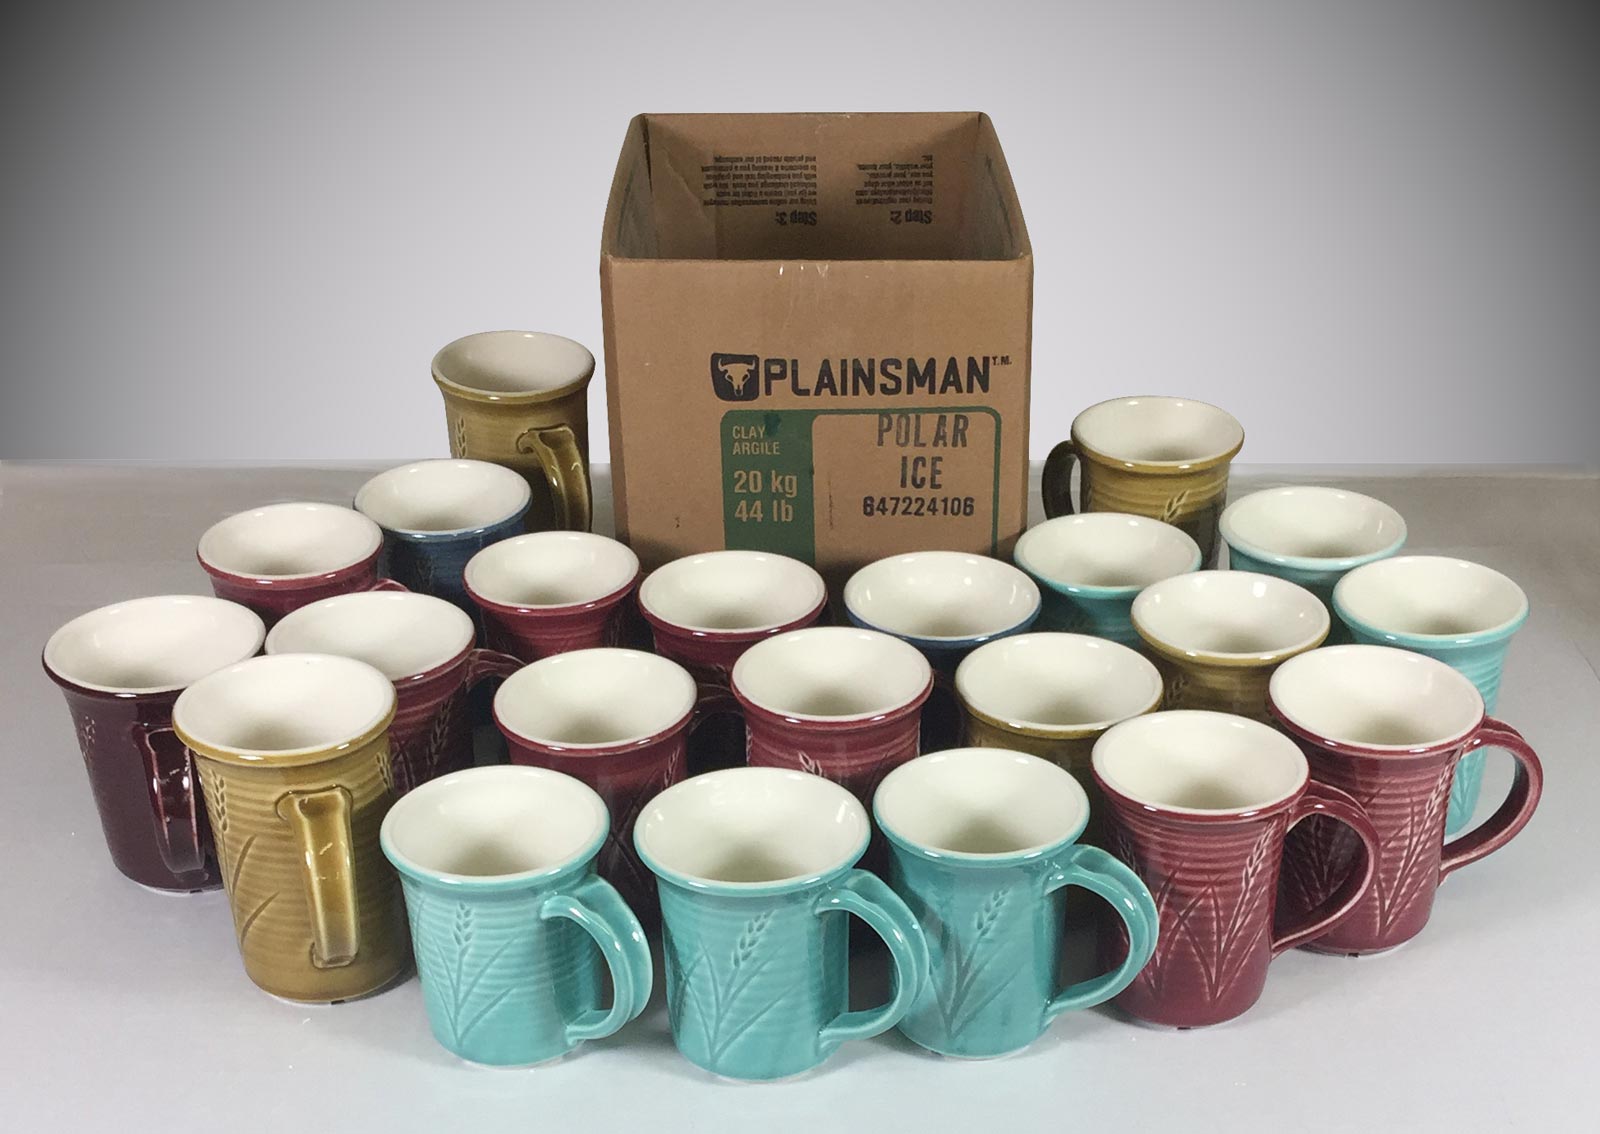
21 mugs made from 1/2 box of clay, 10 kg ( (all scrap was reclaimed). Polar Ice is plastic and you can make more pieces because it can be thrown thinner than most other clays. These have a weight-to-capacity ratio of 1.09 (each 1 gram of fired porcelain can contain 1.09 grams of water). This is the highest of any of our products.
